

はじめに
こんにちは、サイオステクノロジーの小野です。Kubernetesのマルチクラスター管理ツールであるRancherにはHelmリポジトリを登録して、そのリポジトリ内のHelmアプリケーションをGUI上で確認できる機能があります。
今回はChartMuseumというツールでローカル環境にHelmリポジトリを構築し、それをRancherに登録する手順について解説します。
前提条件
今回構築した前提条件は以下になります:
- OSはUbuntuを使用
- Rancher構築済み
- 構築方法は過去の記事を参考にしてください
- Rancher入門:Rancher Serverの構築
- ChartMuseumはHelmで構築
- ローカルに直接インストールやDockerでの構築がありますが、今回はHelmでRancherのクラスター上に構築します
- Storage Class作成済み
- ChartMuseumは様々なクラウドストレージを指定できますが、今回はStorage ClassによるPVを利用します
ChartMuseum構築手順
ChartMuseum用のNamespaceを作成します。
$ kubectl create namespace chartmuseum
ChartMuseumのドメイン(今回はchartmuseum.internal)を設定して、その証明書を作成します。DNSサーバーの設定も同時に行ってください。
$ openssl req -x509 -nodes -days 365 -newkey rsa:2048 \
-keyout chartmuseum.key \
-out chartmuseum.crt \
-subj "/CN=chartmuseum.internal" \
-addext "subjectAltName=DNS:chartmuseum.internal"
作成した証明書をシークレットとして登録します。
$ kubectl create secret tls chartmuseum-tls-secret \
--cert=chartmuseum.crt \
--key=chartmuseum.key \
-n chartmuseum
ChartMuseum自体のHelmチャートリポジトリを追加します。
$ helm repo add chartmuseum https://chartmuseum.github.io/charts
$ helm repo update
Valuesファイルを作成します。今回は以下のように設定しました。それ以外はデフォルトでよいです。
persistence:
  enabled: true
  accessMode: ReadWriteOnce
  size: 10Gi
  storageClass:  <ストレージクラス名> # PVを作成できるStorage Classを指定
env:
  open:
    DISABLE_API: false
    STORAGE: local
    STORAGE_LOCAL_ROOTDIR: /storage
    CHART_URL: https://chartmuseum.internal

ingress:
  enabled: true
  className: nginx # RKE2での構築のためIngress Controllerをnginxに指定。
  annotations:
    kubernetes.io/ingress.class: nginx
  hosts:
    - name: chartmuseum.internal  # 設定したいドメイン名
      path: /
      tls: true
      tlsSecret: chartmuseum-tls-secret
  tls:
    - secretName: chartmuseum-tls-secret
      hosts:
        - chartmuseum.internal
作成したvalues.yamlを使用してHelmインストールします。
$ helm install chartmuseum chartmuseum/chartmuseum -f values.yaml -n chartmuseumChartmuseumが作成されたことを確認します。

ChartMuseumのHelmインストール確認
RancherへHelmリポジトリを登録する方法
ChartMuseumを作成できたので、早速Rancherに登録してみます。RancherUIのApps > Repositoriesを開いてください。Createを押下して、以下のように設定します:
- Target:http(s) URL to an index generated by Helm
- Index URL:https://chartmuseum.internal

Helmリポジトリの登録設定
設定後、証明書エラーが出るので右の三点リーダーメニューから「Edit YAML」を選択してください。その後、spec.caBundleにCA証明書の情報を入力してください。

証明書エラーが出るので注意

Helmリポジトリの証明書の設定方法。caBundleにCA証明書の内容を記載する。
設定後、Activeになれば登録完了です。

Activeになれば登録完了
Helmリポジトリにチャートを保存してみる
RancherにHelmリポジトリを登録することができたので、Helmリポジトリに試しにチャートを保存して、UIで確認してみたいと思います。
検証用のチャートを作成します。
$ mkdir chart-test && cd chart-test
$ helm create my-test-chart
パッケージ化してChartMuseumに保存します。
$ helm package my-test-chart
$ curl -k --data-binary "@my-test-chart-0.1.0.tgz" https://chartmuseum.internal/api/charts
{"saved":true}
RancherUIからRepositriesを開いて、メニューからRefreshを押下することでリポジトリを更新します。

メニューからRefreshを押下する
RancherUIのApps > Chartsを見ると保存したチャートが確認できます。
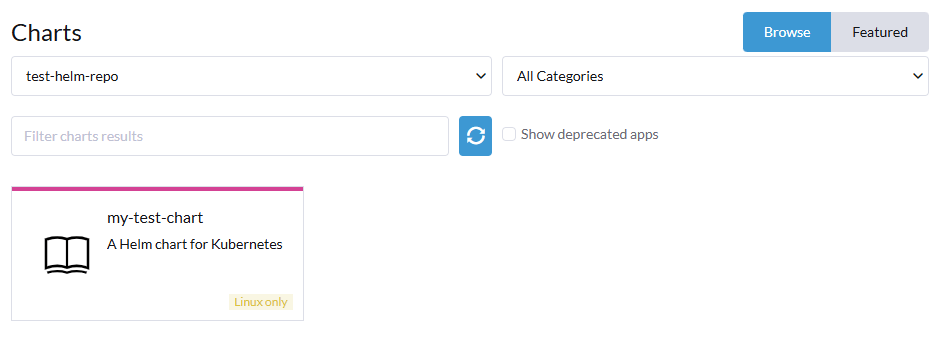
Apps > Chartを開くと保存したHelmチャートが確認できる

保存したHelmチャートを開くと詳細情報が確認できる
せっかくなので、バージョンアップさせて、questions.yamlを追加してみます。questions.yamlとはHelmのvalues.yamlを、Rancher上でGUI(入力フォーム)に変換するための定義ファイルです。これをChartに組み込むことで、YAML編集やvalues.yamlファイルの直接適用しなくても、ブラウザのRancherUIから設定を変更することが可能になります。(参考:https://ranchermanager.docs.rancher.com/how-to-guides/new-user-guides/helm-charts-in-rancher/create-apps)
検証用のチャートのChart.yamlを編集して、バージョンをあげます。
apiVersion: v2
name: my-test-chart
description: A Helm chart for Kubernetes

# A chart can be either an 'application' or a 'library' chart.
#
# Application charts are a collection of templates that can be packaged into versioned archives
# to be deployed.
#
# Library charts provide useful utilities or functions for the chart developer. They're included as
# a dependency of application charts to inject those utilities and functions into the rendering
# pipeline. Library charts do not define any templates and therefore cannot be deployed.
type: application

# This is the chart version. This version number should be incremented each time you make changes
# to the chart and its templates, including the app version.
# Versions are expected to follow Semantic Versioning (https://semver.org/)
version: 0.2.0 # ここのバージョンをあげる

# This is the version number of the application being deployed. This version number should be
# incremented each time you make changes to the application. Versions are not expected to
# follow Semantic Versioning. They should reflect the version the application is using.
# It is recommended to use it with quotes.
appVersion: "1.16.0"
以下のquestions.yamlをvalues.yamlやChart.yamlと同じ階層に作成します。
categories:
- Test
questions:
- variable: replicaCount
  default: "1"
  type: int
  label: Replica Count
  group: "Global Settings"
  description: "デプロイするポッドの数を選択してください"
- variable: service.type
  default: "ClusterIP"
  type: enum
  label: Service Type
  group: "Network Settings"
  options:
    - "ClusterIP"
    - "NodePort"
    - "LoadBalancer"
$ ls my-test-chart
Chart.yaml charts questions.yaml templates values.yaml作成できたら、パッケージ化してChartMuseumに保存します。
$ helm package my-test-chart
$ curl -k --data-binary "@my-test-chart-0.2.0.tgz" https://chartmuseum.internal/api/charts
{"saved":true}
RancherUIからリポジトリを更新して、チャートを開くとバージョンが上がっていることが確認できます。

バージョンアップしていることが確認できる
Installからインストール手順を進めると、questions.yamlを適用したおかげでvalues.yamlのパラメータをGUI上で設定できるようになっています。

questions.yamlのおかげでUI上から設定が可能になっている
終わりに
今回はHelmリポジトリを構築して、Rancherに登録するまでの手順を解説しました。
インターネットに接続できない環境でHelmリポジトリを自作するといったことや、自作のコンテナアプリを管理したいといったことはよくあることだと思います。
みなさんもHelmリポジトリを作成して、Rancherで管理してみてください。
参考
- Rancher入門:Rancher Serverの構築
- ChartMuseum公式サイト
- ChartMuseum Helm Chart
- Rancher公式ドキュメント:Manage Repositories
- Rancher公式ドキュメント:questions.yml


